Tutorial
Requirements
- GSA Search Engine Ranker
- Captcha Solving - REQUIRED: 2Captcha - For solving Recaptcha v2
- Proxies - RECOMMENDED: Blazing SEO Proxies - Use coupon code: serengines to get a 5% Discount. We use these dedicated proxies for testing our engines!
- Catcha-all emails - RECOMMENDED: SEREmails - Premium Subscription and include these with the emails you create from our Email Creator engine
- VPS - As SEREngines uses real browsers, it will require more memory and CPU so make sure you have a powerful VPS
Tutorial
Initial Setup
Grab your API key from the Account section and enter it into GSA Search Engine Ranker and click Update -> Check for updates. This will download all of our premium Web 2.0 and email creator engines.
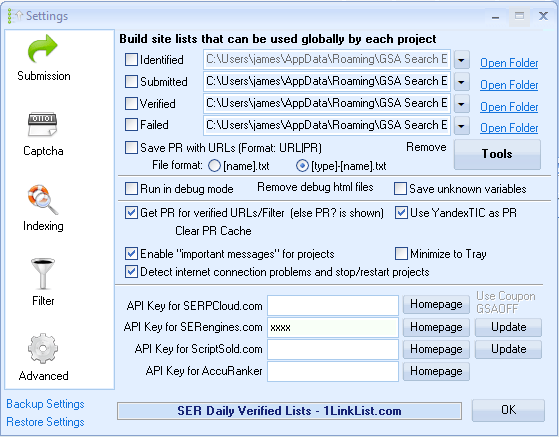
Next we are going to setup CPU and Memory limits to better manage threads. This will reduce the amount of threads GSA Search Engine Ranker uses automatically when the CPU or Memory get too high for your server/vps. This happens from time to time as SEREngines can be resource intensive due to it using real browser technology with full JavaScript support. The memory usage is compariable to those of Chrome and Firefox and depends on the Web 2.0 as some Web 2.0 sites use a lot of JavaScript.
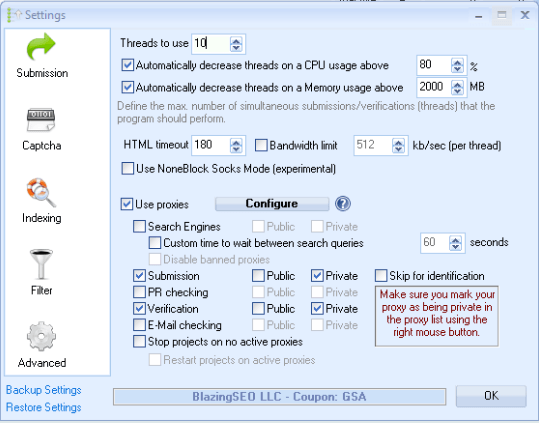
Set the CPU to about 80% and to get your memory limit you should check how much memory is avaiable on your server/vps. Go into your task manager and check the available memory of your system. If your available memory is 3GB, then set "Automatically decrease threads on a Memory usage above" to 2500MB. This will allocate GSA Search Engine Ranker to use a maximum of 2500MB of memory before it starts to reduce threads automatically (and will increase once memory intensive jobs finish)
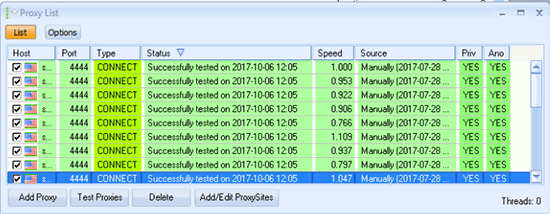
Next add your fresh dedicated proxies from a high quality provider into GSA Search Engine Ranker making sure you set them to CONNECT. Once they are inserted, test them against Google Search to make sure they are in good working order
Once you have added your proxies, make sure that you use them for Submission and Verification like in the image above.
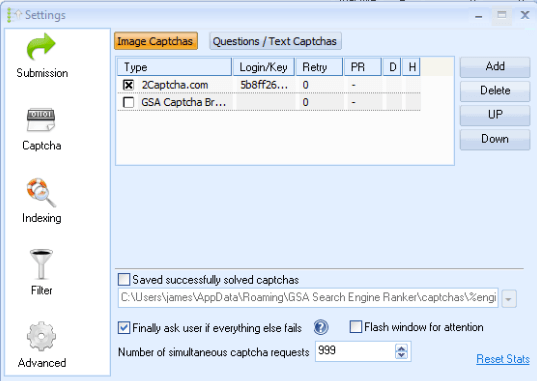
Add your 2Captcha API account information in the Captcha Settings and test to make sure the account is working. It is important to add 2Catpcha as they are the only good provider that solves Recaptcha V2 which is used by about 80% of our high authority web 2.0s.
Tutorial
Setting up a Basic Project for Web 2.0 Blog Creation and Posting
SEREngines doesn't require most of the settings within GSA Search Engine Ranker so setting up your project is fairly basic.
Firstly we are going to configure the Options tab.
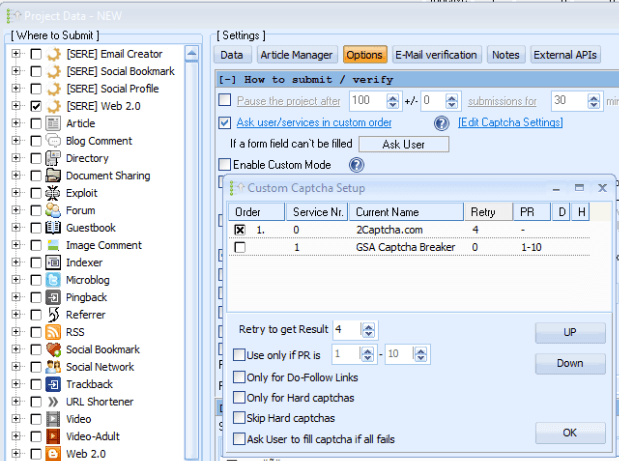
Set your captcha solver to "Ask user/services in custom order". A popup will show all of your configured captcha solving services. Select 2Captcha only, set "Retry to get Result" to 4 and deselect "Use only if PR is"
The next important and probably the most powerful setting in the Options tab is "Scheduled Posting". This must be used if you want good success with the SEREngines addon because it uses GSA Search Engine Rankers powerful retry and account creation/posting scheduling. Without it GSA Search Engine Ranker will only do one attempt at creating the Web 2.0s and then give up.
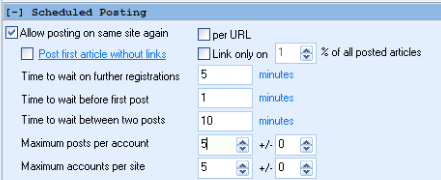
Scheduled Posting is where you are going to set how many Web 2.0 accounts to create per Web 2.0 (for example 10 accounts on Wordpress), how many articles to post, and the delay between these.
Maximum accounts per site is how many accounts per Web 2.0 you would like to create. For example if I wanted to create 5 Wordpress and 5 Tumblr accounts, I would set this setting to 5.
Maximum posts per account is where you will set how many articles to post per Web 2.0 account. For example, if we had 5 Wordpress and 5 Tumblr accounts created and set this setting to post 5 article to each, we would get about 25 articles per Web 2.0 (5 articles on each Web 2.0 account).
Example:
Wordpress Account #1 - 5 Articles
Wordpress Account #2 - 5 Articles
Wordpress Account #3 - 5 Articles
Wordpress Account #4 - 5 Articles
Wordpress Account #5 - 5 Articles
Tumblr Account #1 - 5 Articles
Tumblr Account #2 - 5 Articles
Tumblr Account #3 - 5 Articles
Tumblr Account #4 - 5 Articles
Tumblr Account #5 - 5 Articles
Also make sure you have enough articles setup in the project to be able to post this amount.
Time to wait on further registrations will delay the account creation process on a Web 2.0. For example if this is set to 10 minutes, it will create 1 Wordpress and 1 Tumblr account about every 10 minutes.
Time to wait before first post will delay the first post to the newly created account. This is sometimes used to make your Web 2.0 stick better as some Web 2.0s don't like it if you post an article within minutes of creating the account.
Time to wait between two posts will delay each article post that you do by the amount you set here. For example if I wanted to only post 1 article to the Wordpress and Tumblr accounts I have created per day, then I would set this to "1 days".
Post first article without links is a good setting if you don't want to post article links in the first post. This is mostly used to try and avoid your newly created Web 2.0 accounts from being detected as spam and suspended. There is also an option to "Post last article only with links".
Link to only x% of all posted articles is used to only put a backlink on a certain percentage of your articles posted.
On a final note with Scheduled Posting, it is important to use these settings wisely. If you don't have many proxies then don't set it to create too many accounts per day per IP address/proxy as this is a good way to get your proxies banned on the Web 2.0. Also make sure you have enough articles setup in the project otherwise GSA Search Engine Ranker will throw an error like "Unable to fill variable with content"
The final setting on the Options tab of the Project is how many times to retry a failed job. I usually set this to "4" to increase the likelyhood of success for a Web 2.0

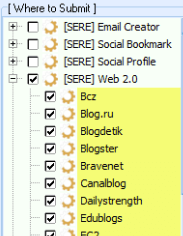
Next select the [SERE] Web 2.0s you would like to create blogs and post to.
Moving on to the Article tab of the Project.
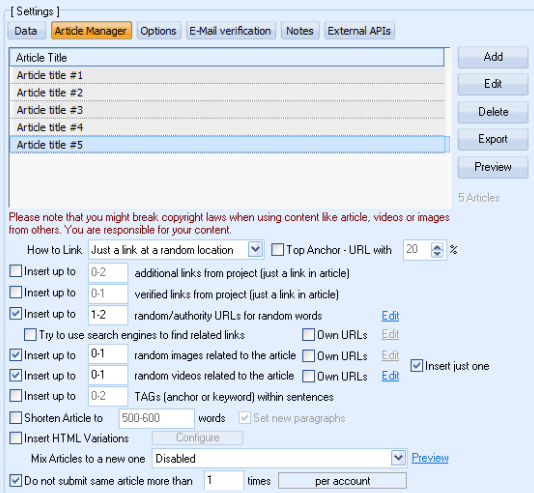
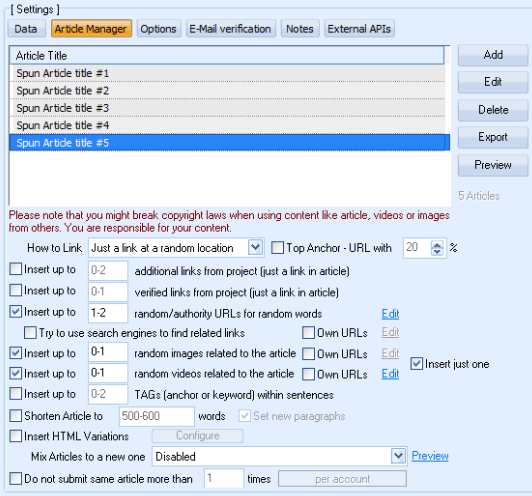
Here you can setup your articles and how you would like to post them. You can insert images and videos based off your keywords automatically and limit one article per web 2.0 account to avoid content duplication by having the same article posted many times on the internet. In the screenshot above I have just setup each article individually, not spun and I want it to only be posted once for this project using "Do not submit same article more than 1 time". It important to have enough articles in your project otherwise GSA Search Engine Ranker will fail on posting jobs with "Unable to fill variable with content".
You can also use the following settings which will generate more articles and have enough content for all your Web 2.0s.
Next add a good mix of catch-all email, inbox.eu and mail.ru email accounts into the project. This is needed because some Web 2.0s don't accept some of the email providers like catch-all.
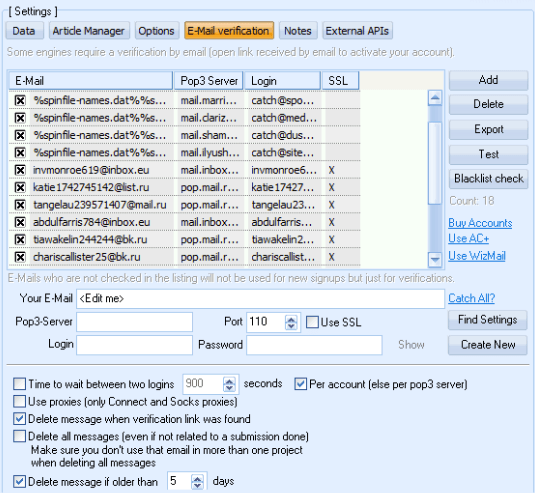
The amount of emails required depends on your "Maximum accounts per site" setting for Scheduled Posting. If you want to create 5 accounts on a single Web 2.0 like Wordpress you will need a minimum of 5 email accounts added here. This is because a single email is required per account per Web 2.0. This won't be a problem because you can use the Email Creator to create as many email accounts as you like. Also mixing in some catcha-alls is a good idea.
Next you need to configure the Data tab.
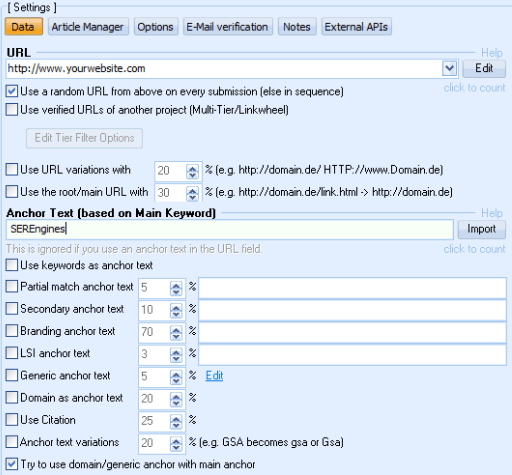
URL is the URL for your backlink.
Anchor Text is the anchor text for your backlink.
You can use the other settings to customize how you would like to setup your backlinks within the articles.
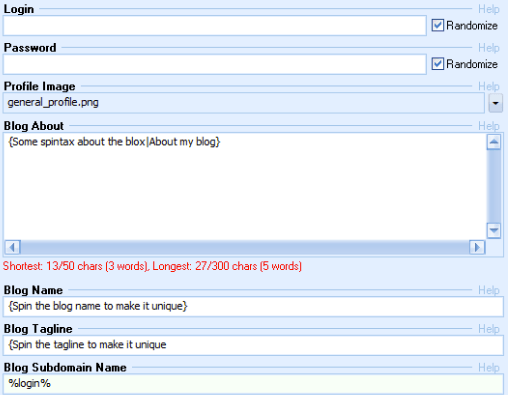
Login & Password is best left as default (Randomize).
Profile Image is where you can set a profile image for your blog account.
Blog About is something about the blog for About Page, or sometimes used in other places. Make sure you use Spintax
Blog Name is the name of your blog. Make sure you spin this one as well to make it unique.
Blog Tagline is just one sentence about your blog which is usually placed under your Blog Name on the created blog. Spin this too.
Blog Subdomain Name is what you use to set the subdomain name of your blog. For example yourblogname.wordpress.com. You can leave this as default (%login%) which will automatically generate it for you or you can customize it yourself, just make sure you highly spin the subdomain name otherwise many web2.0 accounts will fail to create.
Once this is all done, Save your project and start it. Let it run and don't stop and start it as sometimes that effects the job queue. Remember that your Scheduled Posting settings will determine when GSA Search Engine ranker creates and submits to your blogs.
Tutorial
Basic Social Bookmark Project
Coming Soon
Tutorial
Basic Social Profile Project
Coming Soon
Tutorial
Creating Email Accounts
Create a folder on your desktop and call it something like "Emails Created - September". It is recommended to do this so you know what month these email accounts were created. Create a text file for each email provider (emailprovider1.txt, emailprovider2.txt)
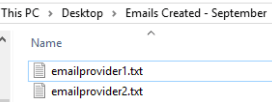
In GSA Search Engine Ranker create seperate projects for each email provider so you can seperate the emails created by each provider, otherwise they will all be mixed in the same .txt file.

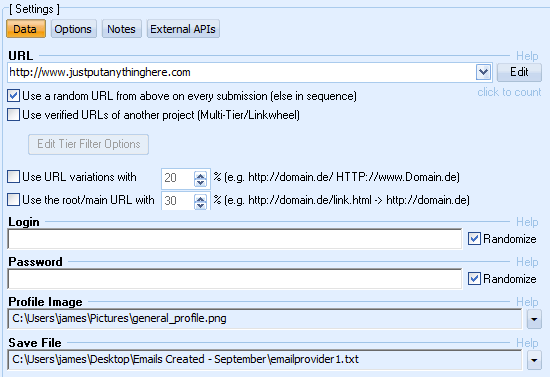
When you create an email project, you'll see on the Data tab there are 2 fields you need to fill. First field is URL, which isn't used for anything, but is required by GSA Search Engine Ranker so just put any URL you want. The second is the Save File option where you will pick one of the .txt files you created in that folder on your desktop.
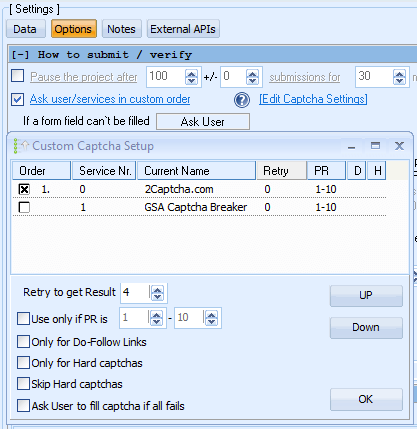
Next go to the Options tab, this is where you will set how many email accounts to create and which captcha solver to use.
The Email Creator will require using a human captcha solver (don't use Captcha Breaker), so make sure you have set that up correctly and it is selected in your project.
The last setting you need to do is Scheduled Posting.
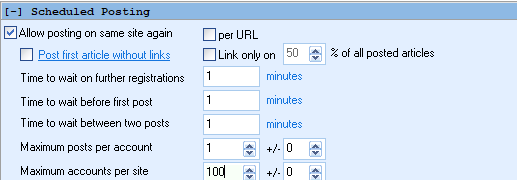
Maximum accounts per site is to set how many email accounts you would like to create. It is important not to create too many email accounts if you don't have many proxies otherwise they can get banned.
Time to wait on further registrations is good for putting a delay on account registrations to save your proxies from being banned if you don't have enough of them.
All of the other Scheduled Posting settings can be left at 1.
Finally it is important to note that the submitted/verified columns in GSA Search Engine Ranker won't increase as it creates email accounts, this is due to how GSA Search Engine Ranker works and there isn't a link to be verified. If you check the .txt files you created, you will start to see emails appear over time.
Start your Email Creator projects, let it run and come back later to check the text files you created and they should be full of fresh newly created email accounts!
Tutorial
Common Error Messages
Proxy [x.x.x.x] related issue, please use another one
This error message occurs when you proxy is having issues, it can mean:
- It is down/offline
- Banned on the site
- Can not authenticate
The solution would be to go into your Proxy Settings and make sure your proxies are working.
No E-Mail found matches mask xxxxx
This means that your project has no supported email provider for the Web 2.0 so it will skip trying to register. The solution for this is to load emails from a different providers (inbox.eu, mailru, catch-alls).
No recaptcha v2 solving enabled
This means the Web 2.0 engine requires a Recaptcha V2 (noCaptcha) captcha solver like 2Captcha.
Captcha was not solved in time
This means that the captcha solver took too much time to solve and GSA Search Engine Ranker gave up. For 2Captcha Recaptcha v2, this can take some time to solve, depending on how difficult it is. If you have setup your project correctly, it will retry.

